Woodshop Workbench
Early in college, I set myself to assembling a functional woodworking area in my parents' basement. This space was nearly ready (save for an immense amount of organizing and cleaning) except that it very badly needed a workbench. I set out to build a heavy-duty bench with unique features.
Overview
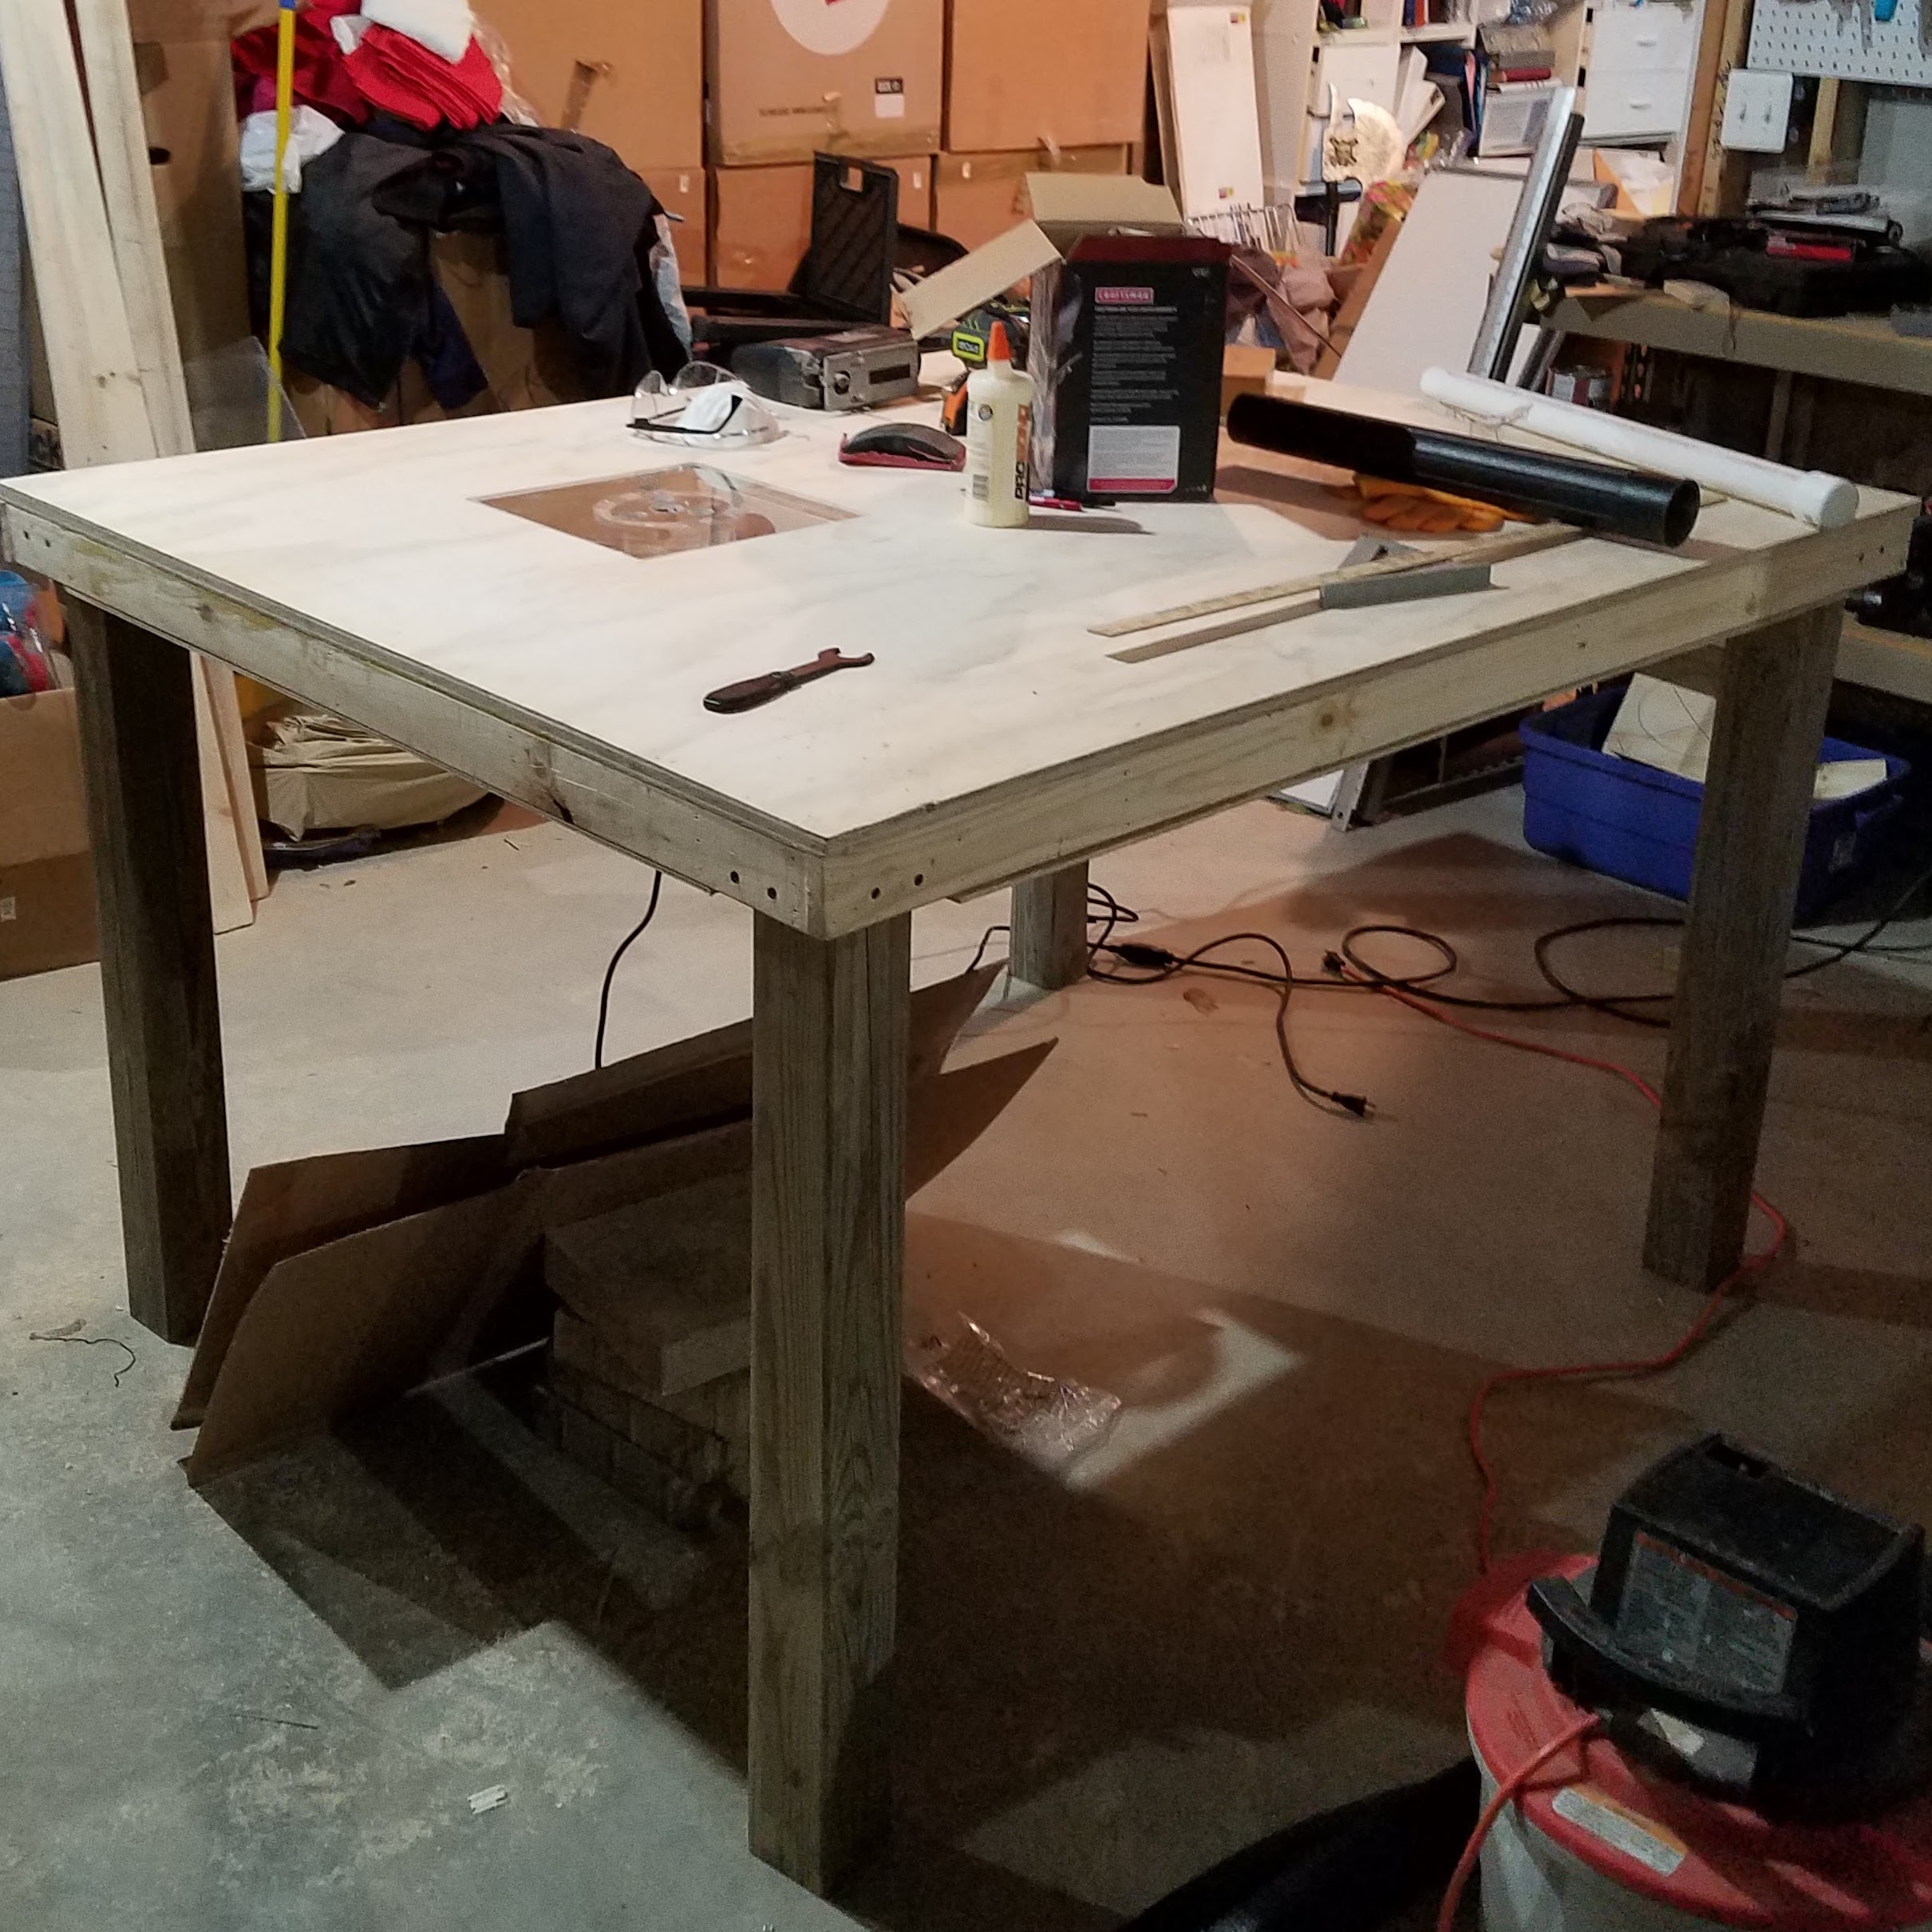
In the summer of 2016 I took it upon myself to assemble a suitable space for woodworking in my parents’ basement. Plenty of storage was already prepared and simply needed to be organized, but we were missing an essential component - a workbench. This being my first foray into design and construction, I took inspiration from the YouTube creator “The King of Random,” who had recently posted a video of his own workbench build. What made his table special was a recessed cutout in the table that allowed the user to insert tools for use as a routing table or a low-precision table saw. This feature is demonstrated in the video below where I swap out a jigsaw table insert for a router.
Design Process
I began with some research. I first needed to find a technique to keep the table top sturdy and rigid, so that over time the tabletop wouldn’t sag, as I’ve seen happen on other plywood tables. I discovered the concept of a “torsion box,” which essentially is a box with an internal frame that prevents flexing or torsion and I elected to build the tabletop using this style of design.
With a basic design ready, I continued with a series of sketches to flesh out the rest of the design. Though immensely helpful, these are unremarkable so I will not include them here. Eventually, I settled on a table of dimensions 5ft L x 4ft W x 3ft H. With this in mind, it was time to sketch out the internal framework for the torsion box. This was to be assembled using 1in x 3in wooden planks as they are readily available, are relatively light, and make the tabletop a comfortable thickness. With dimensioned sketches ready, I wrote up a bill of materials as a shopping list, headed to the local home improvement store, and purchased all the wood I needed. This included:
- The table surface
- 1 4ft x 8ft sheet of 3/4in baltic birch plywood (cut down to 4ft x 5ft and excess)
- The table bottom
- 1 4ft x 8ft sheet of 1/4in inexpensive plywood (cut down to 4ft x 5ft and excess)
- An under-table shelf
- 1 4ft x 8ft sheet of 3/4in particle board
- Internal structure and support for the shelf
- 10 8ft lengths of 1in x 3in planks
Finally, I drew out a dimensioned sketch of all the parts I needed to make, noting how much was required of each. This made it very easy to keep track of my progress and next steps. Now I was ready to get started.
Construction
The plywood for the table top surface and bottom were already cut at the store. Using a circular saw, I measured, marked, and cut the 1in x 3in planks. I glued the walls of the “torsion box” tabletop to the bottom of the birch plywood panel, and reinforced this glue-up with brad nails. I then began to build up the inner framework using a similar technique. I dry fit each segment to ensure that I hadn’t made a mistake, applied glue, put the segment in place, and reinforced it with brad nails. The completed framework can be seen in the photo below. I cut down some scrap pieces and created sockets for the 3in x 3in legs I intended to use, seen installed for a test fit in the picture below.
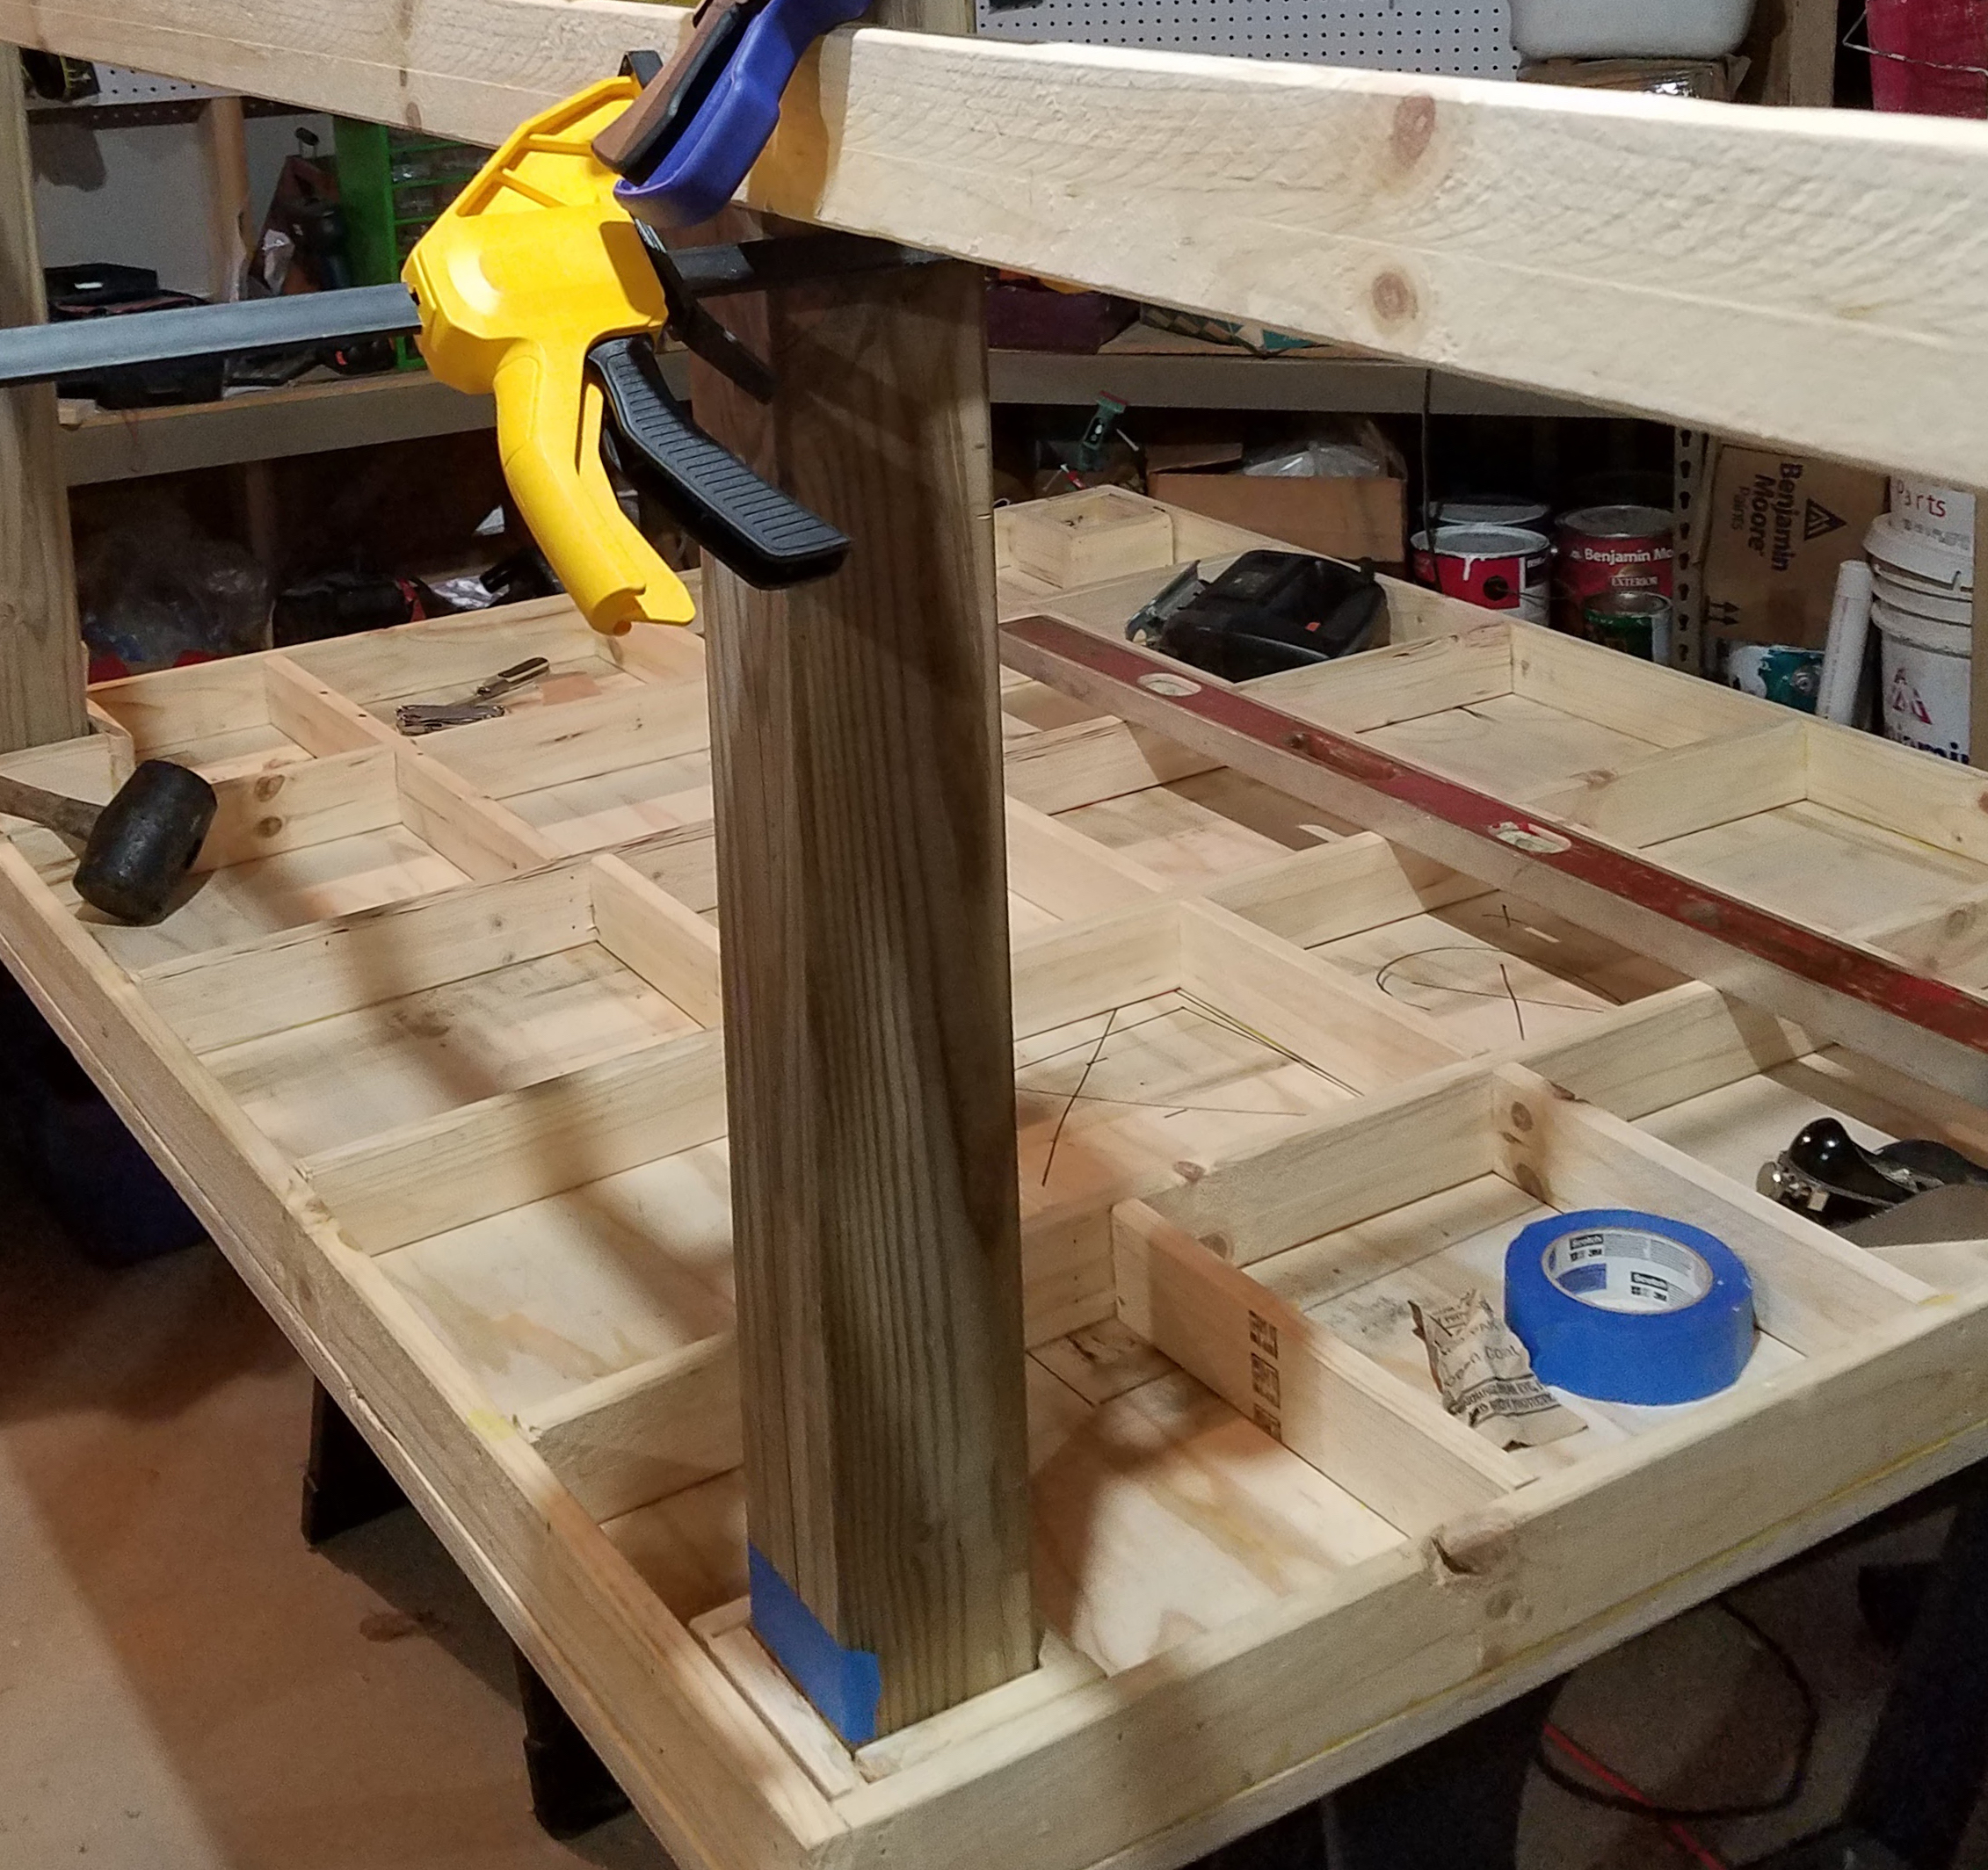
Here you can see the internal frame of the workbench tabletop, which provides the torsion and flex resistance of a torsion box.
With this inner framework completed, I used a hand plane to level out any high spots or strange warps in the 1in x 3in planks. The plywood inside one square of the framework needed to be cut out to allow for the tool insert feature, so I drilled holes through the plywood in the corners of the square to provide clearance for a jigsaw. Then I glued on the bottom panel, which can be seen in the photo below. I then used a jigsaw to roughly cut out the square in the top and the bottom of the table, and used a router to cut the material flush with the square in the inner frame. Finally, I set the router to a cutting depth equal to the thickness of a plexiglas panel, and carved a square channel around the hole, leaving a lip for the plexiglas square to rest in (I hope to have a closeup of this soon). I prepared a router, a jigsaw, and a circular saw with a plexiglas front panel, allowing me to insert each into the recess in the table, and providing functionality similar to a routing table, a scroll saw, and a table saw.
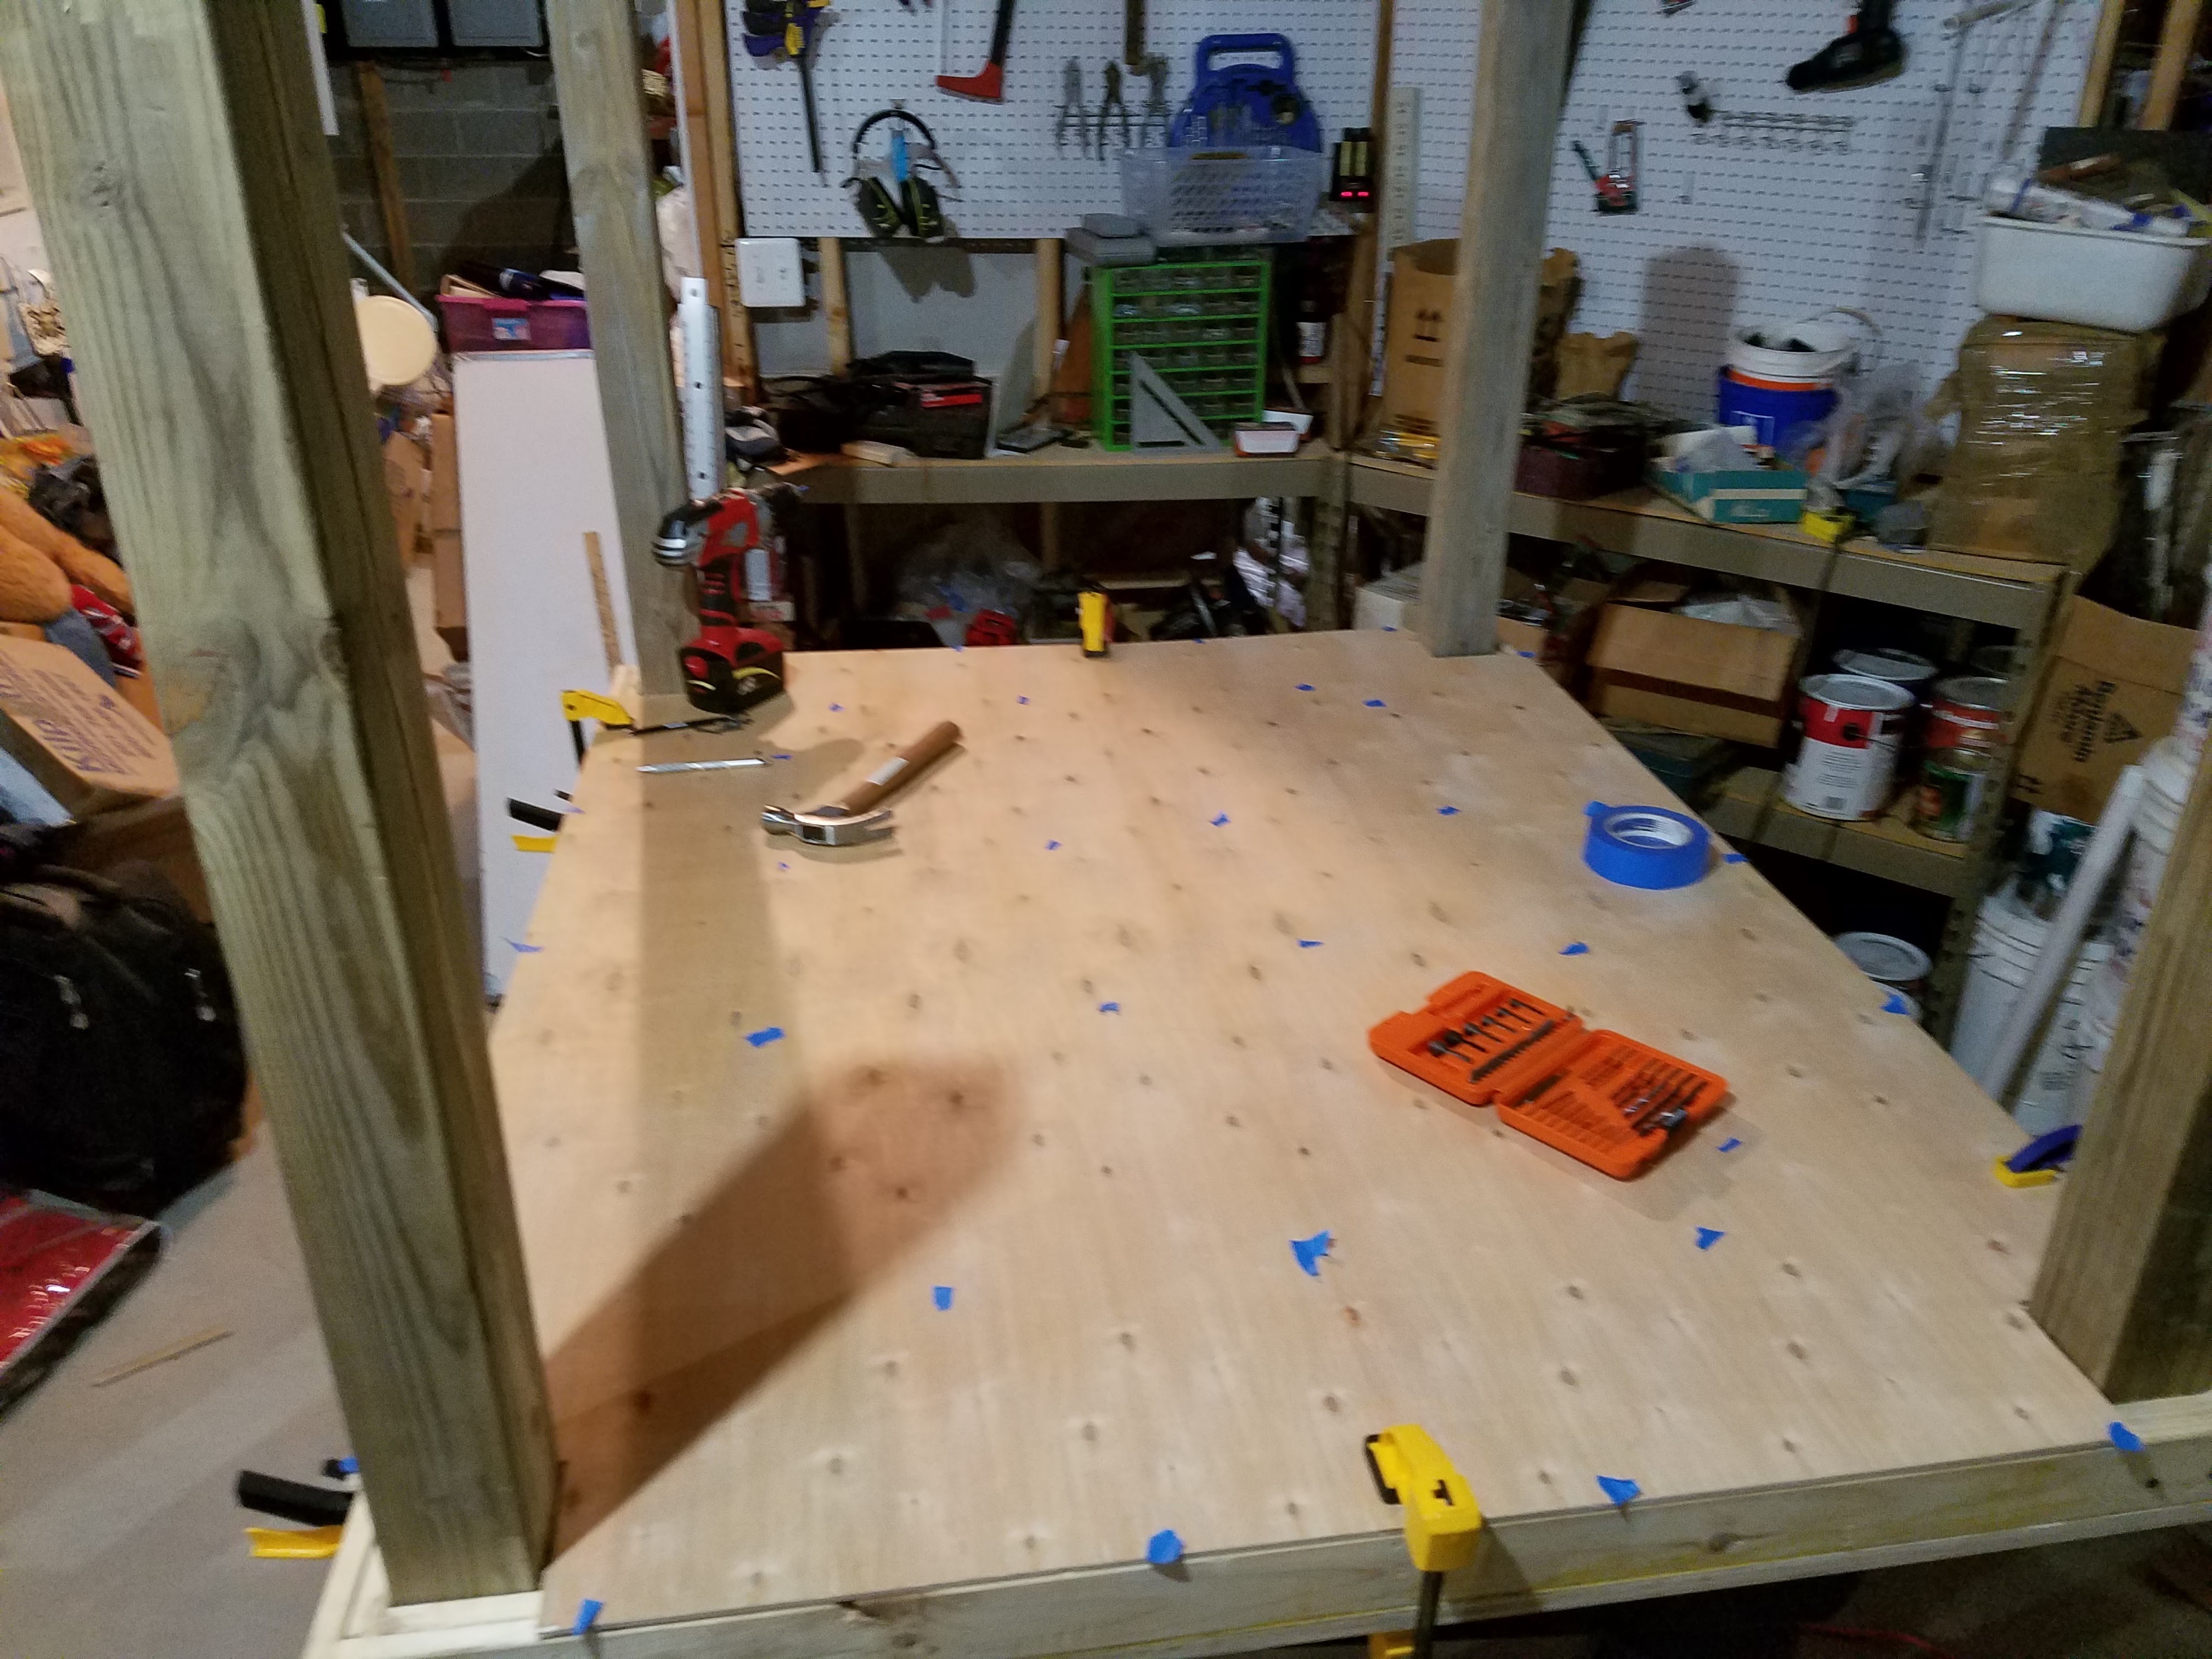
Here you can see the results after the frame was completed and the bottom panel of the torsion box table was glued and nailed on.
The final touch was to add a shelf under the table for storage. 1in x 3in planks were screwed to the substantial legs of the table as supports for the particle board. I measured the outside distances between each leg, and, using a circular saw, a yard stick, and some clamps, cut the particle board to size using the yard stick as a guide to keep the cut straight. I cut clearances for the table legs and, finally, installed the shelf (I hope to have a photo including this soon as well).